
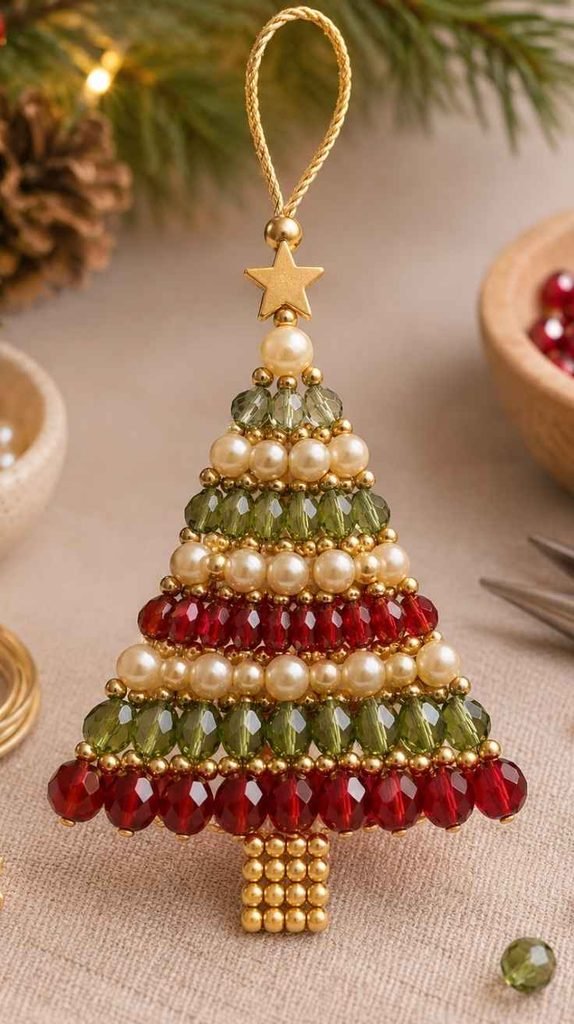
There’s something so charming about handmade Beaded Christmas ornaments, especially when they’re made with simple wooden beads and a few cozy colors. These DIY beaded Christmas tree ornaments have that lovely Scandinavian-inspired look that makes a Christmas tree feel warm, natural, and beautifully decorated.
Project Details
Difficulty: Easy
Time: 20–30 minutes
Style: Scandinavian, rustic, minimalist Christmas
Perfect for: Christmas tree decorations, handmade gifts, and holiday crafting
Materials Needed
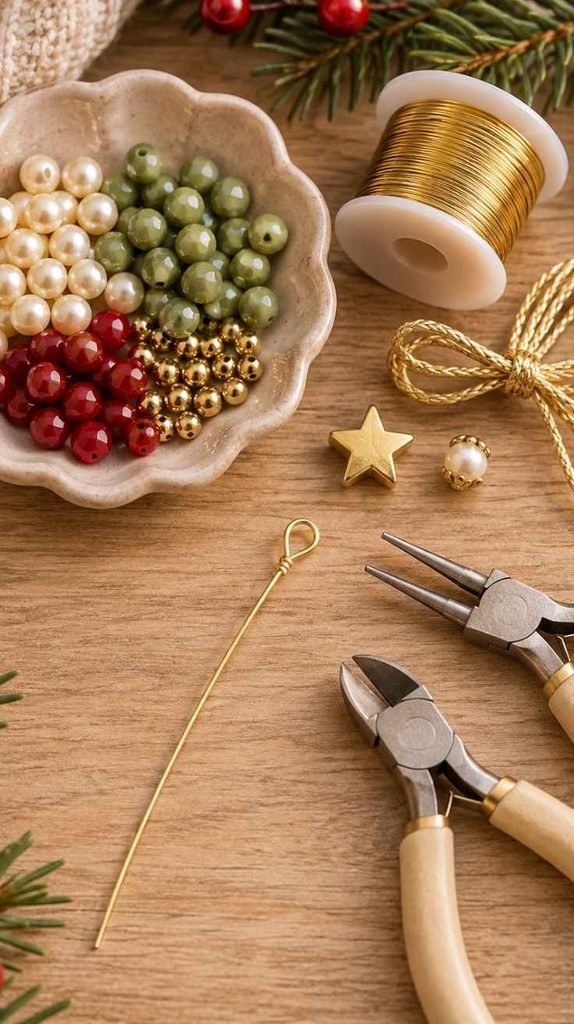
- Small wooden beads (approximately 6–8 mm)
- Green, natural wood, and muted red beads
- Flexible 20-gauge craft wire
- Small star-shaped bead or wooden star
- Twine or thin velvet ribbon for hanging
- Round-nose pliers
- Wire cutters
Tip: A combination of natural wooden beads and muted green beads gives your ornament that classic Scandinavian Christmas look. Add a few dusty red beads for a subtle festive touch.
How to Make Beaded Christmas Tree Ornaments
1. Prepare the Wire and Beads
Start by cutting a piece of craft wire approximately 24 inches long. Choose your wooden beads and arrange them into a color pattern before threading.
We love alternating natural wooden beads with soft green ones, adding an occasional red bead for a little Christmas charm.
Make a small loop at one end of the wire using round-nose pliers. This will become the top of your Christmas tree, where you can attach your hanging ribbon.
2. Thread the First Beads
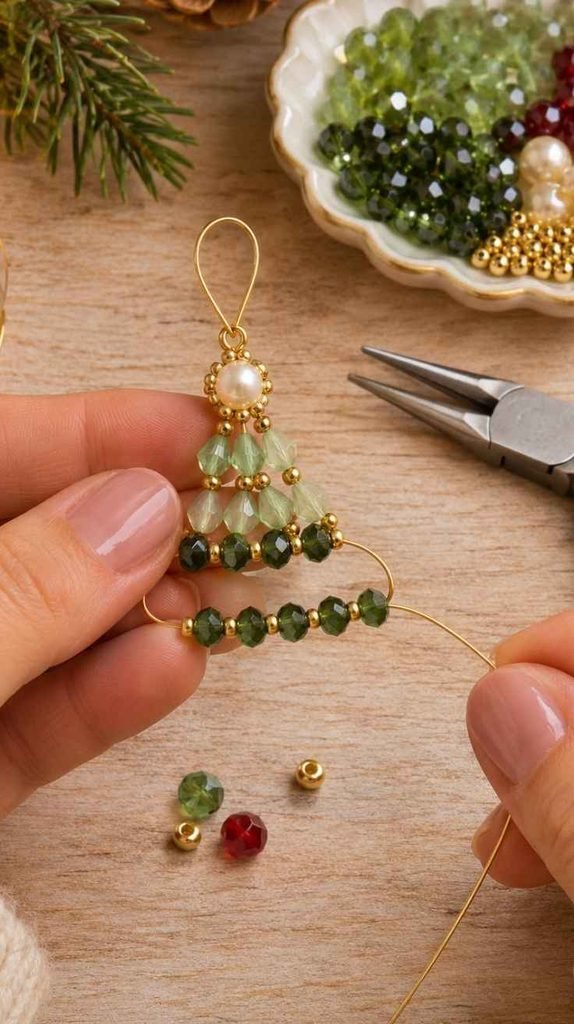
Begin threading a few wooden beads onto the wire, starting just below the hanging loop.
Use three or four beads for the first short section. Gently bend the wire to create the first pointed turn of your tree.
Continue threading another small group of beads and bend the wire back in the opposite direction.
You’re beginning to form a zigzag shape that will gradually become wider toward the bottom.
3. Shape the Christmas Tree
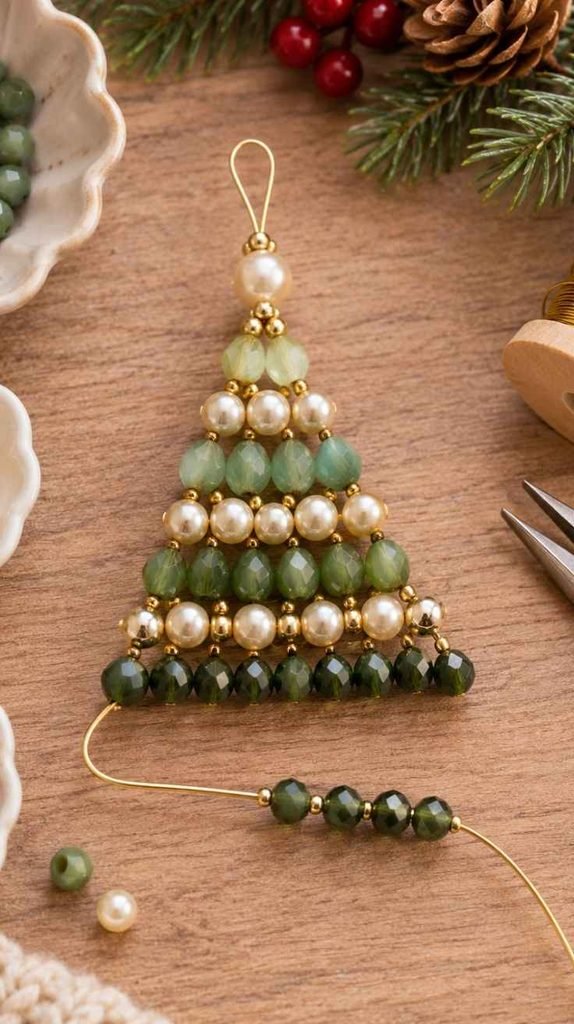
Keep adding beads and bending the wire from side to side, making each new horizontal section slightly longer than the one above it.
The narrowest section should be at the top, while the widest section forms the bottom of your Christmas tree.
Try to keep the spacing even, but don’t worry about making every bend perfectly symmetrical. Those little handmade details give your ornament character!
Once you reach the bottom, gently adjust the wire until the shape resembles a miniature Christmas tree.
4. Add the Tree Trunk and Star
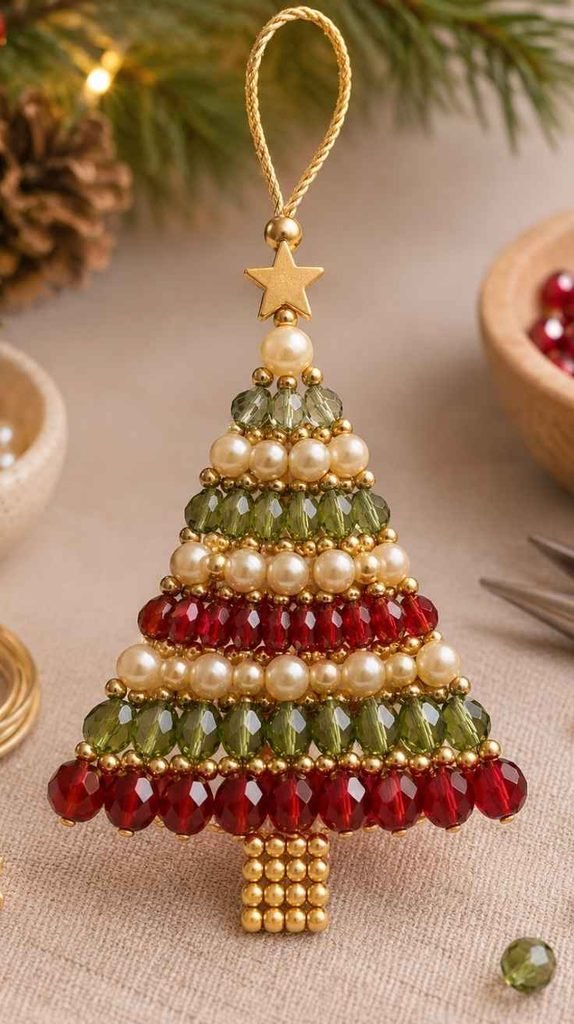
Use the remaining wire to create a small loop beneath the lowest section, bending and securing the end neatly with your pliers. This gives the ornament a simple trunk-like detail.
For an extra festive finish, attach a tiny wooden star near the top of the tree with a small amount of craft glue.
A natural wooden star looks beautiful with neutral beads, while a muted red or gold star adds a lovely pop of color.
Allow the glue to dry completely before handling the ornament.
5. Add the Hanging Ribbon
Cut a short length of twine or velvet ribbon and thread it through the small loop at the top of your beaded tree.
Tie the ends together, leaving enough room to hang the ornament comfortably from a Christmas tree branch.
Now gently straighten the wire sections, adjust any uneven beads, and check that the ends of the wire are safely tucked away.
Your handmade beaded Christmas tree ornament is ready to hang!
Helpful Tips for Making Beaded Christmas Tree Ornaments
Choose a simple color palette. Natural wood, sage green, cream, and muted red work beautifully together and keep the design looking elegant rather than overly colorful.
Use flexible but sturdy wire. The wire needs to bend easily while holding the Christmas tree shape once finished. Thin jewelry wire may be too soft for larger beads.
Try different bead sizes. Smaller beads create a delicate ornament, while slightly larger beads give the tree a fuller, more playful appearance.
Make a matching set. Create three or four ornaments using the same colors but slightly different patterns. They’ll look especially lovely together on a Christmas tree or attached to wrapped presents.
A Cozy Handmade Touch for Christmas
These DIY beaded Christmas tree ornaments are a sweet reminder that beautiful Christmas decorations don’t need to be complicated or expensive.
Whether you hang them on your tree, use them as handmade gift toppers, or make a few for friends, they’re a lovely little project for a cozy winter afternoon.
And once you’ve made your first one, you might find yourself wanting to create an entire collection!