
Painting your own canvas bag doesn’t have to involve detailed sketches or perfect brushwork. A few good colors and one clear idea are often enough to turn a plain tote into something you’ll genuinely want to carry. These easy canvas bag painting ideas use patterns, simple silhouettes and bold shapes that can be adapted even if you’re new to fabric painting. If you prefer more detailed mixed-media designs, you can also explore our painted tote bag ideas with textured accents.
Before starting, wash and dry the bag, slide a piece of cardboard inside and lightly sketch the main shapes with a pencil. Fabric paint works best, but acrylic paint mixed with fabric medium is another practical option.
1. Easy Canvas Bag Painting Idea With Checks and Oranges

A checkerboard pattern looks impressive while being surprisingly beginner-friendly. Use painter’s tape to divide the front of the bag into squares, then alternate dusty pink and terracotta paint, leaving a few sections in the natural canvas color. Inside the empty squares, add small oranges with two loose green leaves. The clean grid keeps the design organized, while the imperfect fruit gives it a relaxed handmade finish.
2. Cozy Books and Coffee Bag

Turn a cream canvas bag into a tiny reading nook by painting three stacked books, round glasses and a steaming coffee cup. Deep burgundy, forest green, muted blue and warm ochre give this design a vintage library feel without making it look too dark. Don’t worry about painting perfectly straight book spines; slightly uneven edges and visible brush marks make the illustration feel warmer and more personal.
3. Moon and Constellation Canvas Bag

Start with a navy tote or paint a large dark-blue panel onto a natural canvas bag. Add one oversized crescent moon using cream and soft gold, then scatter tiny stars around it with the end of a paintbrush. A few thin constellation lines finish the night-sky design. This is one of the easiest canvas bag painting ideas because most of the details are made with dots and short strokes.
4. Woodland Mushroom Design

Paint three red-capped mushrooms in different heights, arranging them among simple ferns, grasses and acorns. Earthy green, rust and warm brown will keep the design sophisticated rather than cartoonish. Begin with the largest mushroom and build the smaller woodland details around it so the composition stays balanced. Cream highlights on the stems and caps will add depth without requiring complicated shading.
5. Painted Travel Stamp Collection

Create a collection of imaginary travel stamps containing tiny beaches, mountains, monuments, windmills or sunsets. Outline each scene with a scalloped painted border and use a different color combination for every stamp. There’s no need to include destinations or lettering—the miniature illustrations already tell the story. This design can grow gradually, making it perfect when you want to paint a few sections at a time.
6. Minimal Matcha Canvas Bag

A single matcha cup can make a beautiful focal point on a sage green or natural tote. Paint a ceramic bowl filled with green tea, add a bamboo whisk beside it and finish with two soft curls of steam. Keep plenty of empty space around the objects for a calm, modern result. Pale pink details and a few scattered tea leaves introduce color without taking away from the simple composition.
7. Easy Painted Cat Silhouettes

Choose three recognizable cat poses: one sitting tall, one stretching and one curled up asleep. Paint each silhouette in a different neutral color, such as black, rust and creamy white, then add only a few facial or paw details with a fine brush. Small dots scattered between the cats help connect the figures. This graphic design is forgiving because each animal is built from basic curves rather than realistic features.
8. Simple Desert Landscape

Layered landscapes are ideal for beginners because every hill can be painted as one solid shape. Begin with a large setting sun, then overlap mesas and desert hills in peach, mauve, ochre and plum. Add a pale winding road and three small cactus silhouettes in the foreground. The limited palette makes this DIY canvas bag painting idea feel polished even though the individual shapes are very easy to create.
9. Croissants and Coffee Pattern

Give a butter-yellow bag a cheerful café-inspired pattern using croissants, coffee cups, tiny butter dishes and a few restrained red hearts. Repeat the motifs across the surface but rotate them in different directions so the layout feels casual. Caramel and espresso-colored brushstrokes create the flaky layers of the pastries, while cream cups keep the overall palette light. It’s playful, but still stylish enough for everyday use.
10. Koi Pond Canvas Bag Painting

Paint two curved koi fish swimming in opposite directions on a pale blue tote, using white as the base and adding loose orange patches over the top. Surround them with a few green lily pads and sweeping blue lines to suggest moving water. The flowing composition makes the bag look detailed, but the fish can be created from simple tapered shapes. Keep the background open so the design remains peaceful and uncluttered.
11. Retro Camera Bag
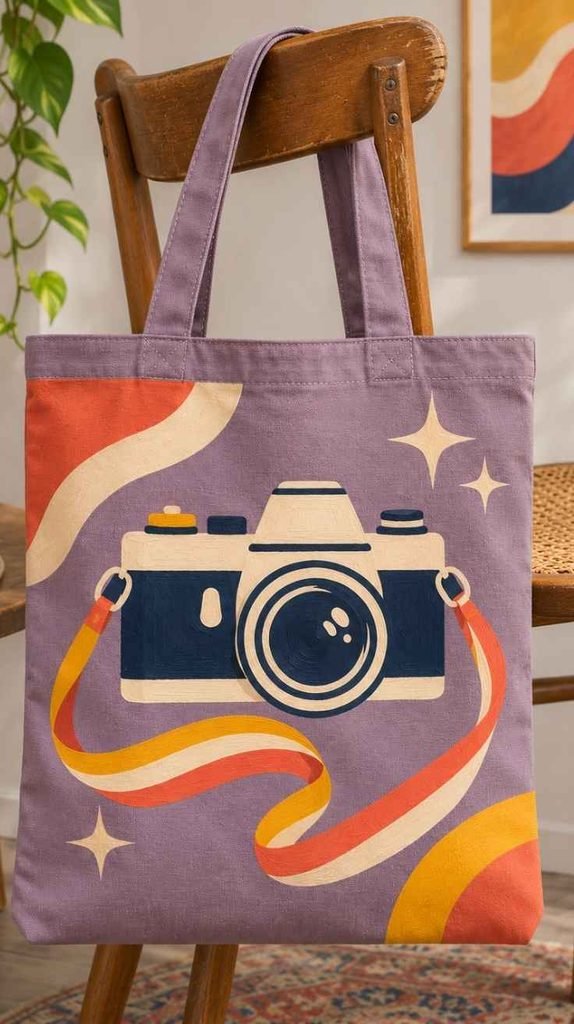
Use a dusty lavender tote as the backdrop for a large vintage camera painted in navy and cream. Add coral and mustard buttons, a curling striped camera strap and a few simple sparkle shapes around the main illustration. The camera can be broken into rectangles and circles, making it easier to sketch than it first appears. Bold color blocks will give the finished bag a fun 1970s-inspired look without requiring tiny details.
12. Farmers’ Market Vegetable Tote

Celebrate market-day colors with an artichoke, tomato, eggplant, radishes and striped squash painted across a natural canvas bag. Space the vegetables loosely instead of placing them in a rigid row, and vary their sizes to create movement. Rich greens, tomato red and deep violet look especially striking against unbleached canvas. Visible brushstrokes work beautifully here because they mimic the irregular shapes and color variations found in real produce.
How to Make Your Painted Canvas Bag Last
Let every paint layer dry before adding details, especially when working with light colors over dark fabric. Once the design is completely dry, heat-set it according to the paint manufacturer’s instructions, usually by ironing the reverse side with a protective cloth. Wash the finished bag gently in cold water and allow it to air-dry. With the right preparation, these easy canvas bag painting ideas can become practical bags you use again and again—not just weekend craft projects.